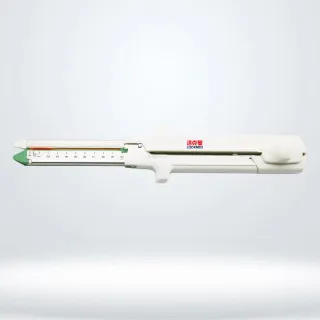
Surgical staples are commonly used in medical procedures to close wounds and incisions, providing a secure and efficient method of skin closure. While surgical staples are designed to remain in place until the wound has healed sufficiently, they must be removed once the healing process is complete to prevent complications and promote optimal scar formation.

Step 1: Gather Your SuppliesBefore beginning the staple removal procedure, gather all necessary supplies, including a staple remover tool, sterile gauze pads, antiseptic solution (such as alcohol or chlorhexidine), and adhesive bandages. Ensure that the area around the staples is clean and free from any debris or contamination.
Step 2: Prepare the PatientExplain the staple removal procedure to the patient and obtain their consent. Position the patient comfortably in a seated or lying position, ensuring adequate access to the surgical site. Provide appropriate reassurance and support to alleviate any anxiety or discomfort.
Step 3: Inspect the StaplesCarefully examine the staples to assess their integrity and alignment. Ensure that all staples are intact and properly positioned along the incision line. If any staples appear loose, damaged, or embedded in the skin, consult a healthcare professional for further evaluation and management.
Step 4: Cleanse the Surrounding SkinUsing sterile gauze pads moistened with antiseptic solution, gently cleanse the skin surrounding the staples to reduce the risk of infection. Dab the skin with the gauze pads, taking care to avoid excessive pressure or friction that may cause discomfort or trauma to the wound area.
Step 5: Position the Staple RemoverSelect an appropriate staple remover tool based on the type of staples used (e.g., standard or winged staples). Grasp the staple remover firmly in your dominant hand, ensuring a secure and comfortable grip. Position the tips of the staple remover around the center of the first staple to be removed, aligning the prongs with the legs of the staple.
Step 6: Remove the StaplesWith gentle and steady pressure, squeeze the handles of the staple remover to compress the legs of the staple together. Maintain consistent pressure while slowly lifting the staple remover upward to disengage the staple from the skin. Repeat this process for each staple along the incision line, working systematically from one end to the other.
Step 7: Inspect the WoundAfter removing all staples, inspect the wound carefully to ensure complete closure and adequate healing. Evaluate the integrity of the skin edges, noting any signs of dehiscence, infection, or other complications. If any concerns arise, notify a healthcare provider for further assessment and management.
Step 8: Apply DressingsOnce the wound is inspected and deemed satisfactory, apply sterile gauze pads or adhesive bandages to cover the incision site and protect it from contamination. Secure the dressings in place with medical tape or adhesive strips, taking care not to apply excessive tension or pressure to the wound.
Step 9: Provide Aftercare InstructionsProvide the patient with detailed aftercare instructions, including proper wound care techniques, signs of infection or complications to watch for, and follow-up appointments as needed. Encourage the patient to contact their healthcare provider if they experience any unexpected symptoms or concerns.
Removing surgical staples is a straightforward and routine procedure that can be performed safely and effectively with the appropriate technique and equipment. By following this step-by-step guide, healthcare professionals can ensure a smooth and comfortable staple removal experience for their patients, promoting optimal wound healing and recovery. With proper care and attention, patients can confidently transition to the next stage of their healing journey, free from the constraints of surgical staples.


Comments
0